Showing posts with label diy. Show all posts

HOMEMADE CLOVE OIL for insect bites


Making homemade clove oil for insect bites is a straightforward process. Clove oil is known for its natural analgesic and antiseptic properties, which can help alleviate pain and reduce the risk of infection from insect bites. Here's a simple recipe to make your own clove oil at home:

Ingredients:
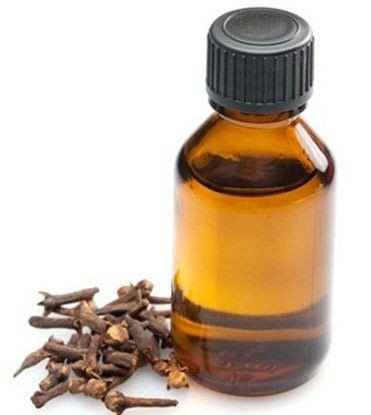
- Whole cloves (dried or fresh)
- Carrier oil (e.g., olive oil, coconut oil, almond oil)
Instructions:

1. Crush the cloves: 

Take a handful of whole cloves and use a mortar and pestle or a grinder to crush them slightly. This helps release the natural oils from the cloves, enhancing the effectiveness of your homemade clove oil.

2. Combine cloves with carrier oil: 

Transfer the crushed cloves into a clean, airtight glass container (such as a small glass jar or bottle). Then, pour your chosen carrier oil over the cloves until they are completely submerged. The carrier oil acts as a base and dilutes the strong clove oil.

3. Seal the container: 

Close the container tightly with a lid to prevent air from entering. Make sure it's airtight to preserve the potency of the mixture.

4. Infusion: 

Place the sealed container in a warm, sunny spot for about 1 to 2 weeks. During this time, the carrier oil will extract the beneficial compounds from the cloves. Shake the container gently every day to facilitate the infusion process.

5. Strain the oil: 

After the infusion period is over, strain the oil to remove the crushed cloves. You can use a fine mesh strainer or cheesecloth to separate the oil from the solid plant material.

6. Store the clove oil: 

Transfer the strained clove oil to a dark-colored glass bottle with a tight-fitting lid. Dark glass helps protect the oil from light, which can degrade its potency over time. Store the bottle in a cool, dark place, away from direct sunlight.

Usage:

To use your homemade clove oil for insect bites, apply a small amount directly to the affected area. Gently massage it into the skin. The clove oil should help reduce pain and inflammation caused by insect bites. However, remember that clove oil is quite potent, so use it sparingly and discontinue use if you experience any irritation or adverse reactions.

Please note that while clove oil can provide temporary relief, severe allergic reactions to insect bites require immediate medical attention. If you experience a severe reaction or suspect you've been bitten by a venomous insect, seek medical help right away.

Recipe for an avocado, honey, and bentonite clay face mask:

Ingredients:
- 1 ripe avocado
- 1 tablespoon raw honey
- 1 tablespoon bentonite clay
- 1 teaspoon water (optional, for consistency) (I didn't use any)

Instructions:


1. Start by scooping out the flesh of the ripe avocado and placing it in a mixing bowl. Use a fork to mash it until it forms a smooth paste.

2. Add the raw honey to the mashed avocado and mix well. The honey provides moisturizing and antibacterial properties to the mask.

3. Next, add the bentonite clay to the mixture. Bentonite clay is known for its ability to draw out impurities and detoxify the skin. Stir the mixture until all the ingredients are well combined. If the mixture is too thick, you can add a teaspoon of water to thin it out slightly.  (Use plastic utensils when working with bentonite clay)
4. Once the masque is ready, wash your face with a gentle cleanser and pat it dry.

5. Apply a thin, even layer of the masque to your face, avoiding the delicate area around your eyes. You can use your fingers or a clean brush for this.

6. Let the mask sit on your face for about 10-15 minutes or until it starts to dry. During this time, the bentonite clay will work to absorb excess oil and impurities from your skin.
7. Once the mask is dry, rinse it off with lukewarm water. Gently massage your face in circular motions while rinsing to exfoliate the skin.

8. Pat your face dry with a clean towel and follow up with your regular moisturizer to lock in hydration.

Note: Bentonite clay can be drying for some skin types, so it's important to moisturize after using this mask. It's also a good idea to do a patch test on a small area of your skin before applying the mask to your entire face to ensure you don't have any adverse reactions.

Enjoy your homemade avocado, honey, and bentonite clay face mask!

DIY Aloe Vera and Honey Cream for skin

Making a DIY aloe vera and honey cream for your skin is a great way to harness the natural benefits of these ingredients. Aloe vera is known for its soothing and moisturizing properties, while honey has antibacterial and moisturizing properties. Here's a simple recipe you can try:

Ingredients:
- 1/4 cup pure aloe vera gel
- 2 tablespoons raw honey
- 2 tablespoons coconut oil or olive oil (optional, for added moisture)
- 5-10 drops of essential oil of your choice (optional, for fragrance)

Instructions:
1. In a mixing bowl, combine the aloe vera gel and raw honey. Stir well to ensure they are thoroughly mixed.
2. If you're using coconut oil or olive oil, melt it in a double boiler or microwave until it becomes a liquid. Add it to the aloe vera and honey mixture and stir until well combined.
3. If you prefer a scented cream, add a few drops of your favorite essential oil and mix again.
4. Transfer the mixture to a clean, airtight container.

Usage:
1. Before applying the cream, make sure your face is clean and dry.
2. Take a small amount of the cream and gently massage it into your skin using circular motions.
3. Allow the cream to absorb into your skin for a few minutes.
4. You can use this cream as a daily moisturizer or as a soothing treatment for irritated or dry skin.

Note: This cream should be stored in the refrigerator to prolong its shelf life. Discard the cream if it changes in color, consistency, or develops an unpleasant odor.

Remember, everyone's skin is different, so it's always a good idea to perform a patch test on a small area of skin to ensure you don't have any adverse reactions to the ingredients before applying it to your entire face.

Simple recipe for a DIY face scrub using natural ingredients

Here's a basic recipe you can try:

Ingredients:

- 1 tablespoon of fine granulated sugar or brown sugar
- 1 tablespoon of honey
- 1 tablespoon of coconut oil or olive oil

Instructions:
1. In a small bowl, combine the sugar and honey.
2. Add the coconut oil or olive oil to the mixture and stir well until all the ingredients are thoroughly combined.
3. Gently apply the scrub to your face using circular motions, avoiding the delicate eye area.
4. Massage the scrub into your skin for about 1-2 minutes, allowing the sugar granules to exfoliate and the oils to moisturize.
5. Rinse your face with warm water and pat dry with a clean towel.

Note: If you have sensitive skin, you may want to reduce the amount of sugar or opt for a gentler exfoliant, such as finely ground oats or coffee grounds.

Remember to perform a patch test on a small area of your skin before applying the scrub to your face to ensure that you don't have any adverse reactions to the ingredients. Also, keep in mind that everyone's skin is unique, so if you experience any discomfort or irritation, discontinue use and consult a dermatologist.

Diy gluten free shampoo

Creating your own gluten-free shampoo at home can be a simple and effective way to avoid gluten if you have celiac disease or gluten sensitivity. Here's a basic recipe for a gluten-free shampoo:

Ingredients:
- 1 cup liquid castile soap (unscented)
- 1 cup distilled water
- 1 tablespoon jojoba oil
- 10-15 drops essential oil of your choice (optional)

Instructions:
1. In a bowl, combine the liquid castile soap and distilled water.
2. Add the jojoba oil to the mixture and stir well.
3. If desired, add 10-15 drops of your favorite essential oil to give your shampoo a pleasant fragrance. Stir again.
4. Pour the mixture into a clean, empty shampoo bottle or container.
5. Shake well before each use to ensure all ingredients are properly mixed.
6. Your gluten-free shampoo is now ready to use.

Notes:
- Liquid castile soap is a gentle and natural soap made from vegetable oils. Look for a brand that clearly states it is gluten-free to ensure it does not contain any gluten-derived ingredients.
- Distilled water is preferred to ensure the purity of the ingredients.
- Jojoba oil is a moisturizing ingredient that can help nourish the hair and scalp.
- Essential oils are optional and can be added for their fragrance or potential hair benefits. Choose oils that are safe for topical use and avoid any that may cause irritation or allergic reactions.

Remember to patch test the shampoo on a small area of your skin before using it on your scalp to check for any adverse reactions. Also, keep in mind that homemade shampoos may not produce the same lather as commercial shampoos due to the absence of synthetic foaming agents.